Yes, this article is long with lots of detail. We spent six months scouring Pinterest, Amazon, Google, and message boards to collect ideas for this party. We also discovered new ideas of our own. We felt it important to collect our ideas and findings into one place so others could share our love for Tolkien’s imagination.
Lord of the Rings Birthday – Our Fellowship
The thing about our parties is, three of our four children’s birthdays are between the middle of August to the middle of October. Once you plan all of the birthdays around other family and school events it’s a party every other week with one large three week gap in between two of the parties. Well, it just so happens that one of our children’s birthdays is during the Christmas season. This year we tried something new. We moved the Christmas-baby’s birthday celebration to fit within that three week gap. The result? A birthday party every other week for eight weeks… and a neighborhood Halloween party two weeks after the last birthday. Each child would have their own party with their own guests. As parents we’d let them invite as many guests as they’d like… but the party itself would be our birthday gift to them. Ten weeks of parties! We call it, BIRTHDAY SEASON!
Lesson learned: By combining the theme, pooling funds, and knowing the theme far in advance it allowed us to go a bit overboard on decorations. Most importantly, we had time to spend the birthday budget carefully and get things on sale months before they were needed. I doubt we paid full price for anything except food. Even most of the non-perishable foods were purchased on sale (we would purchase five parties worth of that item all at once). Note: We enjoy our living space so many of the decorations were designed with the idea that they’d be set up and taken down every two weeks. Items like the map and tree were left alone. However, the outdoor fence and Hobbit door could be set up in ten minutes or less.
Would we have gone to this much effort for one party… probably not. But for five parties (four birthdays plus a neighborhood Halloween party), YOU BET!
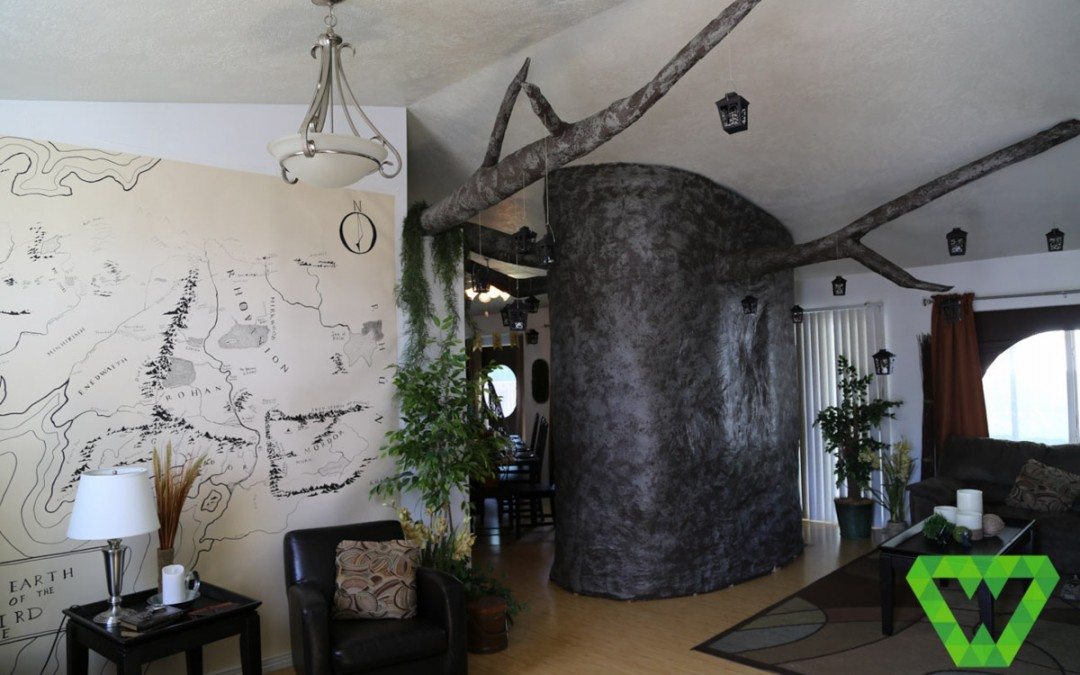
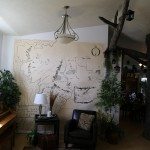
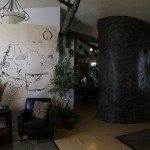
It’s not an exaggeration to say that our home has been transformed into a scene from Middle Earth. From an entire wall with a map of Middle Earth to a tree built in our living room, a hobbit door on the front porch and a fence with a sign quoting the Hobbit– and so much more- our family and guests alike have been able to grasp and embrace the Middle Earth concept. With that said, we would love to share with you the ins and outs of our Lord of the Rings (LOTR) party.
-
- The Front of our Bag Eng.
-
- LOTR Decorations
-
- Lord of the Rings Birthday
-

- The map is a piece of seamless photography backdrop paper.
-

- Scrolls
-
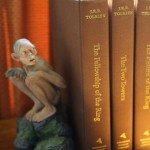
- Gollum is watching the books.
-

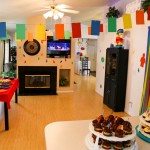
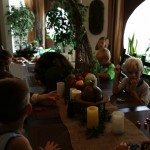
- The living room.
-
- Paper mache tree and paper lanterns.
-
- The living room, the paper mache tree and map.
-

- The Food table.
-
- Silhouette Cameo cut lanterns
DECORATIONS
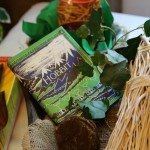
You could say we’re avid yard sale shoppers. With four kids and a taste for travel we cut corners wherever we can. Plus we love the treasure hunt adventure. We found several pieces of greenery (trees, vines, plants, leaves, etc) from yard sales for a grand total of about $10 that complemented the plates that we found for $.30 each. Let’s not forget the reusable glass mugs with chalkboard-style labels to write the guest names on them; given to us by a friend after a party. The only drawback to these labels is that the material will never cleanly come off of the glass/ mug or whatever you use; be aware (Amazon Label Link).
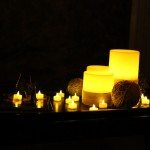
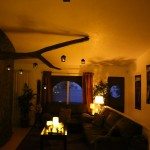
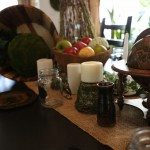
Candles
Candles were a big part of the ambiance. Three of the parties were to take place during dusk and early evening. We used a variety of sizes and styles throughout the kitchen and living room- battery-operated, of course. The tea lights can be bought with batteries from Amazon for about $0.50 a piece. I’d recommend buying as many as you need all at once so the flame colors all match. We were very careful to find the warm-yellowish flame colors (Amazon Candle1 Link, Candle 2 Link). Our lights have lasted several evenings without needing new batteries (comments online say they last 70+ hours). We’d suggest ordering replacement batteries (CR2) when you order your lights. It just makes things more convenient.
Other small items that brought the theme to life included the LOTR books, figurines, Chess pieces, and chunks of wood spread throughout the living room and kitchen. Since Brian is a huge LOTR fan he had a lot of these items he’d collected over the past 20+ years.
-
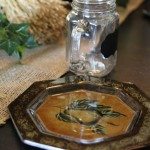
- The plates were found on major discount for about $0.30 a piece. They lasted all four parties plus our Halloween party.
-
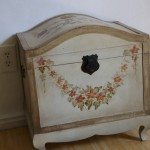
- Found for $3 at a yard sale. It held all of our game pieces (i.e. BINGO) and game prizes.
-

- Lots of candles.
-

- Candles
-

- Lord of the Rings Birthday
-
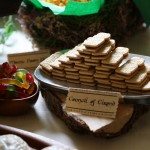
- EL Fudge cookies as the Council of Elrond
-

- Reusable glass mugs with chalkboard stickers.
-

- Decorations. Notice the Rubbermaid container full of rings. Thank you Amazon.
-
- candles
MAP
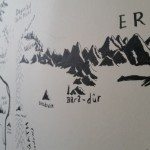
Brian took a roll of cream-colored seamless photography backdrop paper (purchased for $18 to $28 at a local photography/camera store) and hand-drew the map of middle-earth. At first he tried using a high quality .jpeg image he found online but it didn’t work at all. Eventually he found a nice 2’x2′ folded map in one of the LOTR books and he scanned it VERY high quality (he said the final image was over 40 MB in size and was 12 scans photoshopped together). He borrowed a 720p projector and projected this high quality map onto the wall (seamless paper) from about 15+ feet away. The problem was, each pixel from the 720p projector was so large at that distance that Brian could only use it for basic tracing. Mountain range here, MORDOR letters there…. etc. The projector only worked well enough to trace about 10% of the map leaving Brian to free-hand the rest. The trees took the longest. Brian used a variety of Copic markers, adding shadows with the thicker points and outlining with the thinner tips. It really helps having brush-ends on your makers. There are wallpapers like this online but they cost in excess of $200 and may not be designed for your wall size.
-
- handdrawn map
-
- The living room, the paper mache tree and map.
-
- Decor
-

- drawing the map
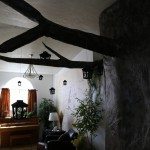
Round Windows
We took brown Masonite board (from local home improvement store for about $8 to $10 for an 8′ sheet) and cut out round windows. We first cut the rectangle to fit the windows then using a string and pencil traced an arch. Note: Some windows were arches while the smaller windows were actual circles. We used a jigsaw to cut out the boards. It took a little bit of time to make everything exact but completely worth it! The only downside to the circular windows was that we weren’t able to keep blinds during those 10 weeks. Again, the sacrifice of time and privacy was worth it. I also liked having the natural color of the board as opposed to painting them.
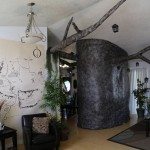
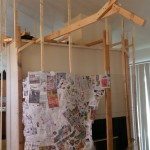
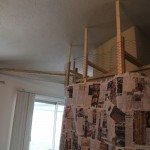
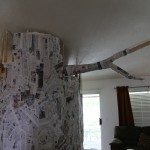
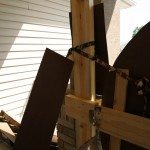
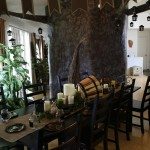
Tree
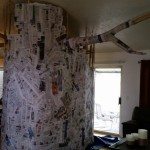
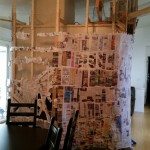
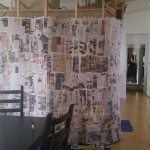
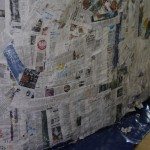
I think the funnest project of all was, as a family, we built a tree in our living room. Yes, a tree. Brian built a simple frame out of scrap wood we had around the house. The frame was built to sit free-standing over our fireplace. There were no nails or screws placed into the house itself. We wanted everything to come down cleanly without any scars. The frame was flimsy until we stapled (using the nail/staple gun) chicken wire around the pieces of wood from floor to ceiling. Then, we used leftover newspapers and sales ads from a local store (the non-waxy sales ads) and cut them into strips about 8”x4”. We reached out to hotels and our local Home Depot asking for any extra papers they could spare. We made a paste and used it to mache the entire tree.
Through trial and error, we found the perfect recipe (at least it was the best for us) for paper mache glue.
Take 2 ½ cups of all-purpose flour and mix it in with 2 ¾ cups of hot water.
The best mixer is an immersion hand blender. Mix until well blended; no chunks of flour. Dip the strips of paper into the glue then, using your fingers, wipe away any excess glue. Plaster to your mache project. If you are dealing with a large surface or a concave surface the paper will pull away as it dries. Before applying your strips of paper, tape (using blue painter’s tape) thin strips to whatever surface you’re working on. (So, we taped uneven strips to the chicken wire… about 8 inches wide.) It helps stick better and prevents some cracking during the drying process.
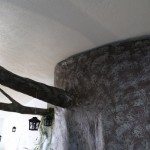
After a couple of weeks of drying (mandatory for such a large project – we had many cracks that needed repairing before painting), we painted the tree with a base coat. The paint made the newspaper lines disappear and protected the tree. We had hundreds of little hands all over that thing. It held up well after all five parties. Even with all of our drying some cracks still appeared after painting. We contemplated repairing those but honestly, they kind of looked like tree bark so we left the cracks. The gray “bark” paint was applied with a large sponge (like one of those large yellow sponges used in drywall surfacing). Brian took a pair of needlenose pliers and pulled out pieces of the sponge to distress it, remove the corners, and make it look more organic.
Note: The largest branch that hung over the living room was the most difficult. Brian carefully placed a fulcrum between the branch and the 60lb counter-weight. We wanted to make sure it wasn’t going to fall on anyone. It never budged.
-
- Tree structure and Paper Mache
-

- Paper mache tree & structure
-
- Paper mache tree. The pain really helped hold the tree together and make the newspaper lines disappear. I only had to use one coat of paint. It gave the tree extra resilience from little hands. EVERYONE wanted to touch the tree. After hundreds of hands and 9 weeks it was still in great condition.
-

- Silhouette Cameo cut lanterns
-
- Silhouette Cameo cut lanterns
-

- Paper mache tree & structure
-

- Tree limbs and lanterns
-
- Silhouette Cameo cut lanterns
-
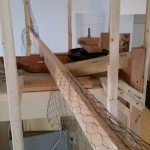
- The chicken wire was acquired on discount from a local co-op store. It was rusty in parts and they couldn’t sell it for animals. I offered to take it off of their hands for cheap. Everyone was current on their tetanus shot.
-

- The paper mache tree frame was built around our fireplace thingy. The important thing was I didn’t want to put a nail or screw into the actual house. This sat free-standing around the fireplace. After 7 months it held well and with only a tiny scratch for damage. The frame was weak until I added chicken wire.
-
- Round Hobbit Windows
-
- Lord of the Rings Birthday
-
- Paper mache tree and structure
-
- I didn’t want any nail or screws in my drywall so I used a 40lb counterweight and brackets to make sure the branches didn’t budge.
-
- Tree structure and Paper Mache. Note: anchors (newspaper and painter’s tape) had to be put in places such as indentations, so the paper wouldn’t pull away when drying.
-

- Paper mache tree
-
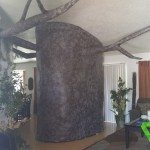
- Behold, the tree. about 11 feet tall with 10′ branches reaching out into the room. We wanted the tree to loom over the room.
-
- Tree structure and Paper Mache
-
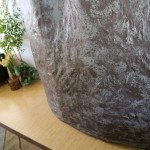
- The tree’s paint job was a dark brown followed by a lighter gray applied by a large sponge (one of those cheap large yellow ones used for drywall, etc). I textured the sponge myself using a pair of needle nose pliers and just pulling large chunks of the sponge apart.
-
- Silhouette Cameo cut lanterns
-
- Paper mache tree
-
- Paper Mache tree
-
- The living room, the paper mache tree and map.
-

- The paper mache tree frame was built around our fireplace thingy.
-
- Paper mache tree & structure
-

- Tree structure and Paper Mache
-

- Paper mache tree
-

- Paper mache tree
-

- Getting set up
The tree was inspired by Bilbo’s home Bag End which is built under a large tree. In the Peter Jackson movies this wasn’t emphasized but if you’re a book lover then you’ll remember tree is discussed multiple times. Many artists show Bag End with beautiful, clean tree trunks or clean roots extending down into the corners of a refined English living room or dining area. Our tree doesn’t exactly fit that “down” or “root” description, but it was fun to create and gives a fantastic earthy feel.
When a guest would come through the door they would say, “wow” and have a feeling of being somewhere different than a suburb living room. I guess that was the ultimate goal.
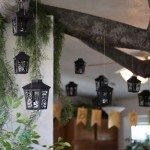
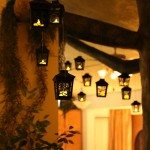
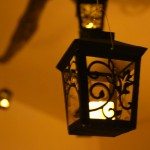
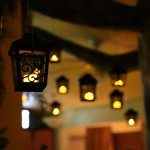
Lanterns
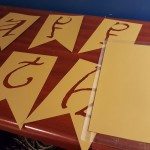
To add a touch of middle-earth, we made 28 elf-like lanterns to hang from the tree (two different sizes). Brian purchased a pattern online for $0.99 and altered it quite a bit. We used our Silhouette to cut out a pattern on black cardstock paper. Gluing them together was a whole family affair. We placed battery-operated tea lights in each one of the lanterns. A hole was designed into each of the lantern backs so we could easily access the lights. It wasn’t our intention to leave the lights up for the entire 10 weeks, but we kind of got used to them. We were sad to see them go. We haven’t been able to pack away the paper lanterns yet because friends keep wanting to borrow them for their own events (we don’t mind). Maybe you’ll see them again at another Wesley party!
-
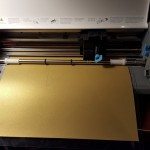
- making the Happy Birthday sign…cutting with the Silhouette Cameo.
-
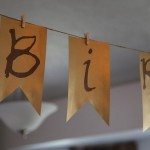
- Birthday SIgn held up by hemp rope.
-
- Paper mache tree and paper lanterns.
-
- Silhouette Cameo cut lanterns
-
- Silhouette Cameo cut lanterns
-
- Getting set up
-
- making the Happy Birthday sign…cutting with the Silhouette Cameo.
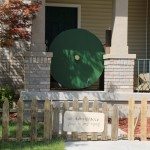
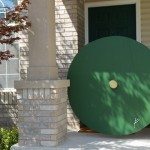
Hobbit Door
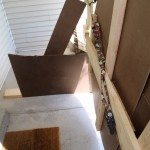
If you’re familiar with the Hobbit or Lord of the Rings at all, you will remember that Bilbo had a round door with a brass knob in the middle. Brian made the door with left over masonite board (two half circles from the large window arches). He secured it with one hinge-design inspired by J.R.R. Tolkien. Looking back on it now, the one hinge was probably not the greatest idea because it seemed to lose the integrity of support for such a structure. We had to add cargo straps to help keep things taught and so the door would open and close properly. Once the door was made, we used green latex paint for the main portion of the door and the knob was spray painted a golden color. Brian even added Gandalf’s scratch to the door (vinyl sticker).
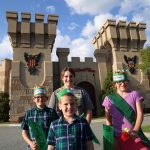
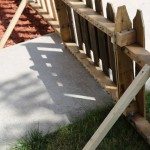
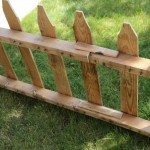
Fence
The fence was made of wooden pallets. Brian broke out every other board and then cut it in half. He hand shaped the pickets with a reciprocating saw to give it the picket-look. As for the other nails in the pallet? He just left them. The key was to allow the fence to 1) open and close and 2) able to take down each week. Tent stakes were used to secure the gate in place and could easily be removed. The gate had two hinges that opened relatively easily with a gentle push. We placed a sign on the gate that states, “No admittance except on party business.” Again, we used the Silhouettte for the pattern and used vinyl for the lettering.
-

- The palate fence posts. Simple tent stakes were used to keep it in the ground.
-
- The Front of our Bag Eng.
-
- The horrible back of the round door. I wish I had used two hinges. I eventually covered this with some masonite to hide the ugly
-
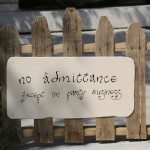
- A space piece of masonite painted with spare paint. The words are vinyl cut out by the Silhouette Cameo.
-
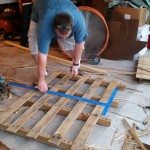
- making the fence. Take a palate, break out every other board then cut in half.
-

- Parker and the Hobbit door.
-
- The Hobbit door with Gandalf’s scratch. I had wanted to draw vertical black lines to make it look less like a viking shield.
-

- Justin and Parker at the Hobbit Door
-
- The palate fence posts. Simple tent stakes were used to keep it in the ground.
-
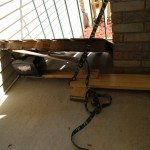
- The horrible back of the round door. I wish I had used two hinges. I eventually covered this with some masonite to hide the ugly. A spare car battery was a perfect counterweight.
-
- The palate fence posts. Simple tent stakes were used to keep it in the ground. A nail gun came in handy.
-

- The palate fence posts. Simple tent stakes were used to keep it in the ground.
-
- The horrible back of the round door. I wish I had used two hinges. I eventually covered this with some masonite to hide the ugly. Cargo straps helped keep things taught and made the door workable. A second hinge would have helped too.
FOOD
Some think we tend to go overboard with food, but we usually end up feeding 20-30 people (our family included) during every party (over 150 for the Halloween party). This year, we served the following items and named them accordingly:
- Rotisserie Chicken– Shire Roasted Chicken
- Bugles– Witchking Fingers
- Pretzels– Gandolf’s Staff
- Homemade Bread– Lembas Bread
- Goldfish– Beorn’s Fish
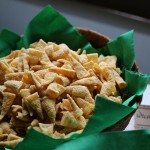
- Funions– The One Ring
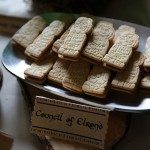
- Keebler Elf Cookies– Council of Elrond
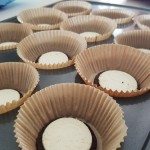
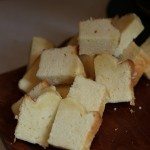
- Fudge Striped Cookies with M&M’s in the middle – Hobbit Doors
- Grapes– Dragon Eyes
- Cheese Popcorn/ Cheetos– Mount Doom Lava
- Cupcakes (the birthday kid’s choice of cupcake with a souvenir ring on top – not all had rings)
- Cubed Cheddar Cheese– Shire Cheese
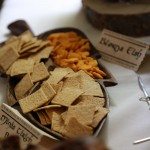
- Wheat Thins – Minas Tirith Bricks (yes, lame name, we know)
- Triscuits – Galadriel’s Woven Treats (also lame name)
- Lemonade– Farmer Maggot’s Ale
-
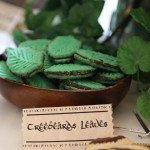
- Treebeard’s Leaves. Found these at our local grocer.
-

- Lord of the Rings Birthday
-
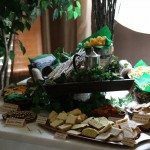
- The food table (minus the chicken)
-

- Roasted Chicken from Sam’s or Costco.
-

- Gollum’s Worms (gummy worms). These were a favorite.
-
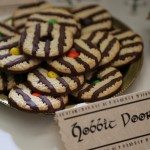
- Hobbit Doors can be made up a day ahead of time. Fudge striped cookies with M&Ms (turn the M&M logo downward).
-

- Cupcake table. There are two candles because one of the birthday boy’s friends also had a birthday that same day. We sang to both.
-
- Decoration
-

- Lord of the Rings Birthday
-

- Beorn’s Fish (goldfish) could have been called Gollum’s fish but we already had Gollum’s worms. Wheat thins were given the random name of Minas Tirith Bricks… I dunno if that’s the best name of them.
-

- The breads look so nice before being cut. The breads could be made ahead of time and kept in airtight containers.
-
- Oreo Cupcakes..yum. With cookies and cream icing.
-

- Lord of the Rings Birthday
-
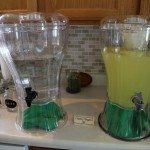
- Farmer Maggot’s Ale (lemonade) and water.
-

- We used both cheese popcorn and Cheetos for “Mount Doom Lava” depending on which kid’s birthday it was.
-
- Witchking Fingers (Bugles corn chips)
-

- The breads look so nice before being cut. Homemade pound cake. The breads could be made ahead of time and kept in airtight containers.
-

- Lord of the Rings Birthday
-
- Beorn’s Fish (goldfish) could have been called Gollum’s fish but we already had Gollum’s worms. Wheat thins were given the random name of Minas Tirith Bricks… I dunno if that’s the best name of them.
-
- The Food table.
-

- The breads look so nice before being cut. The breads could be made ahead of time and kept in airtight containers.
-

- Dragon Eyes – Grapes. We tried several varieties and colors.
-
- EL Fudge cookies as the Council of Elrond
-

- The breads look so nice before being cut. The breads could be made ahead of time and kept in airtight containers.
-
- EL Fudge cookies as the Council of Elrond
-
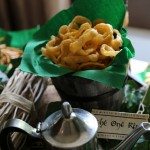
- The One Ring (Funyun Rings). Yes, we already had The One Ring donuts. But hey, who’s counting?!?
-

- Lord of the Rings Birthday
-
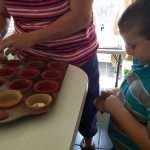
- Parker helping with Oreo cupcakes
-

- The Breads
Each child picked their own cupcake flavor for their own party. I was able to make the breads and cupcakes the day before and store them in airtight containers. I wouldn’t ice the cupcakes until the morning of the party. Grandma was responsible for her legendary lemonade. It is AMAZING. Just don’t ask how much sugar is in it. Each party used about 5 to 7 gallons of lemonade so she would make it ahead of time and store in cleaned gallon milk cartons.
GAMES
We’ve had combined-themed birthday parties in the past. We found it rather difficult to plan games that were easy to set up, affordable, and middle-earth themed. There were plenty of ideas online but for us only a handful seemed to fit.
- Tenzi– Recently, some friends introduced us to the quick dice game Tenzi. We quickly found that playing it kept most of the kids entertained while all the guests arrived for the party. For more information on how to play Tenzi, click on this Instructions link. You’re going to end up paying about $15-20 for a Tenzi set that comes with about 40 dice for four people to play. Visit Amazon for a set of 100 dice for less than $20. We bought 200 dice so we had enough for 30+ guests. Note: you can make it easier for newbies by taking out two or four dice from their ten. As they get better you add them back in. This lets people of all skill levels play at the same time. Warning, the Wesleys are NOT responsible for any future Tensi addiction you might experience. One reason we chose this game was because the kids could play it while guests were arriving. We figured that they probably played dice (chance) games in middle-earth. Last year we did coloring pages (which worked well) but we wanted something different this year. People are always late arriving, so the first 20 minutes of each party was Tensi to accommodate late arrivals. Each game takes about 30 seconds so it’s fast-paced and keeps everyone entertained. We used placemats to prevent small dice dents in our wooden table.

Tenzi Dice Game
- BINGO– in hindsight, we should have called it BILBO. Through Pinterest we discovered Waltzing Matilda’s website where they had enjoyed a LOTR party as well. She had photos of their BINGO game. Sure, we could have made our own but hers were full-color and already made. We reached out to her and she kindly sent us the MS Word files. We had to make a few alterations to accommodate our group size. Clear flattened marbles (like the ones you put as decoration in vases) were perfect for BINGO markers. We pre counted each group of markers and placed them in cheap zip lock bags. BINGO was a huge success. After playing the kids placed their markers back into their bags and the game was ready for the next party. We struggled to figure out party gifts for the kids. We wanted something adventurous. After hours of looking online Brian found tiny compasses on Amazon. Not exactly LOTR but still adventurous, right? The comasses were handed out to winners after each game. We made sure everyone went home with one compass.
-

- Lord of the Rings Birthday
-
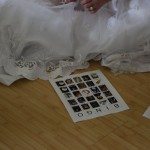
- BINGO…. we should have called it BILBO. Flattened glass marbles (often used in vases for decoration) were used as markers.
- The One Ring– a fancy name for Donut on a String. We hung about 20+ strings on our back porch and the kids raced to see who could eat the donut the fastest. One thing we learned while playing this game is that you can’t get the cheap syrupy donuts (like from Walmart… they make a mess). Find a local bakery. They are more expensive. Also, spread the strings out so the kids don’t share their donuts (and germs) with the other guests.
-
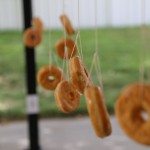
- “The One Ring” donut on a string eating contest.
-

- donut eating contest
-

- Parker owning his donut
-

- Rebecca (Lady Galadriel) enjoying her donut
-

- Katie just won the donut eating contest.
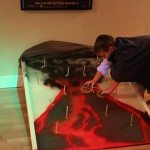
- Relay Race/ Obstacle Course–
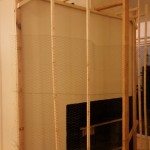
- The guests start out climbing through “Shelob’s” lair with only a black light to lead the way. In the lair, there are strings (thick yarn) attached to 1 x 1 strips we placed inside our bathroom downstairs (being remodeled). The string is strewn in several different directions, causing the kids to have to climb through to the other side of the room. This was, by far, the most repeated game. At each party and after the games we had more requests to do the spiderweb game than any other. Each time adults had to step in and restrict the number of times the kids would play in order to preserve the game for future parties. The yarn would get torn a bit but it was easy to repair. We had no idea that this game would be so popular. We used thick plastic (black contractor bags) to help hide the unsavory part of our demolished bathroom. Note: If your string is too strong or too small it could cause injury. While we didn’t have this happen, we’ve seen it before. That’s why we strongly suggest yarn.
- Once out of the “spiderweb”, they move to the next room where they break into teams. Each team is racing to knock down aluminum cans (we used soup cans) with pictures of bad guys from the Lord of the Rings/ Hobbit with plastic bows and arrows.
- Next, the kids tossed “the ring” into Mount Doom. It’s a piece of plywood screwed to a couple of pieces of wood to provide an angle for tossing the rings. To add to the concept of the throwing the ring into Mount Doom, Brian spray painted a volcano onto the plywood then drilled the holes and placed wooden dowel rods in the holes for the kids to toss the ring onto. The rings were made of light wooden rings that we purchased from the local craft store. We used silver and gold spray paint to distinguish from the two teams. The teams could move on after they got 5 points. We used the Silhouette to print out the Elvish letters that were put on the painted rings.
- Last, they are instructed to throw paper plates (NOT PICTURED) into a chest. The first team that gets the most wins receives a plastic miniature compass. This game was made up at the last minute. It was quite fun but would have been better if we had used heavier paper (disposable) plates. We tried gluing two or three paper plates together but that would have been unnecessary with a bit of planning. We only used the plate game for two of the five parties.
-
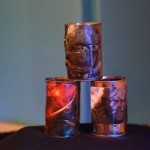
- Empty food cans with LOTR baddies photos taped to the can. The images were donated by a friend and came from an old LOTR daily desk calendar.
-
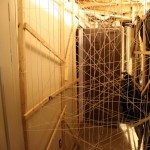
- Shelob’s lair with the light on. A black light really help give this character. Black contractor bags helped mask the rest of the bathroom (being remodeled).
-
- We got these bows and arrows for $5 a set at Walmart. I needed two but bought a third just incase. They are a pretty horrible shot and this part of the relay race was quite the bottleneck. However, it was one of the kid’s favorites. I was surprised how many kids didn’t know how to knock an arrow and play. An older kid was assigned to man this game and reclaim shot arrows. After about 100 kids played we only had one broken arrow.
-

- bow and arrow game. It seems close but those bows are pretty weak.
-
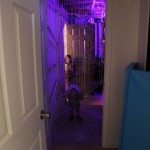
- Shelob’s lair was built in a bathroom we’re remodeling. We used spare pieces of wood and black contractor trash bags to create the “tunnel”. We used thick yarn to make the string. Skinny string can hurt if it’s caught in the right place. The yarn was easy to repair if it got broken.
-
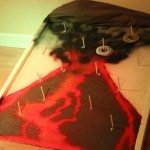
- Ring Toss game. This board was repurposed from last year’s “LEGO pinewood derby race” game.
-
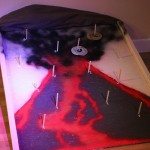
- LOTR Ring Toss….. toss the One Ring into Mt Doom! This game was much harder than expected b/c of the oval rings. We made each kid play until they got 5 points. It was surprisingly difficult b/c of the oval shapes.
-

- Ring toss game. These are actually wooden O letters from a local hobby store (bought w/ half off coupons) and spray painted silver and gold (2 teams). The letters were vinyl stickers cut out by the Silhouette cameo. They stickers held tight for all 4-5 parties and well over 100 kids.
-
- Parker playing the ring-toss game.
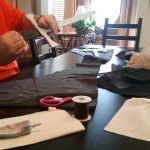
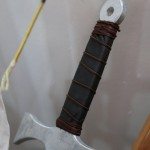
- Necklace Craft– We filled up plastic containers with beads and gave each guest a piece of thin twine to make a necklace. Each kid got a sword we ordered online and they made their own necklace according to their liking. We provided a clothespin to prevent the necklaces from falling apart and beads falling everywhere while making them. Once they were done designing their masterpiece, the adults tied them off long enough that the kids could slip it off without any difficulties (Brian learned this the hard way and tied a few strings “regular necklace length” which had to be cut off and remade in order to fit over a child’s head while tied).
-

- Parker making his Sting necklace. Hemp string.
-

- Guests making the Sting necklace.
- Movie– We used The Hobbit movies to entertain the kids while we were prepping other things like the food or a games. Note: We used the 1977 cartoon The Hobbit for the little kids and the 2012 live-action The Hobbit for the older kids. Not all parents let their children watch the 2012 Hobbit.
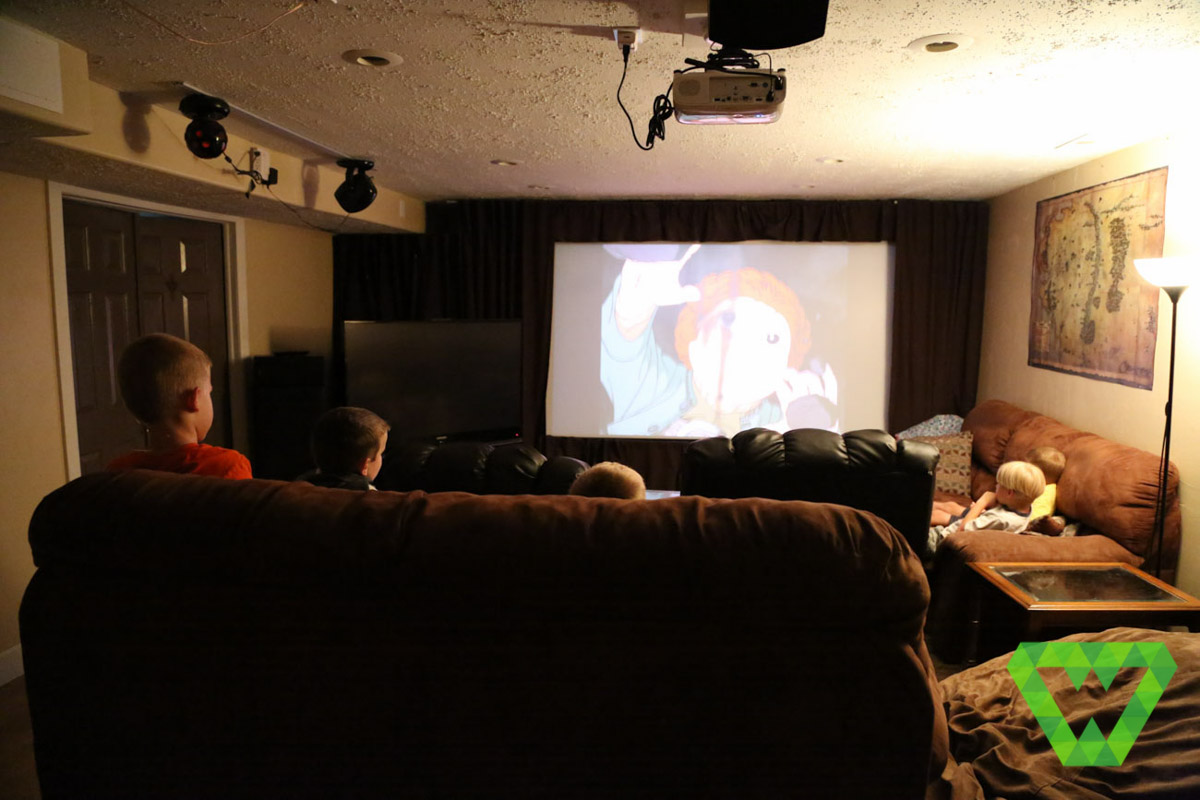
Watching The Hobbit Cartoon (1977).
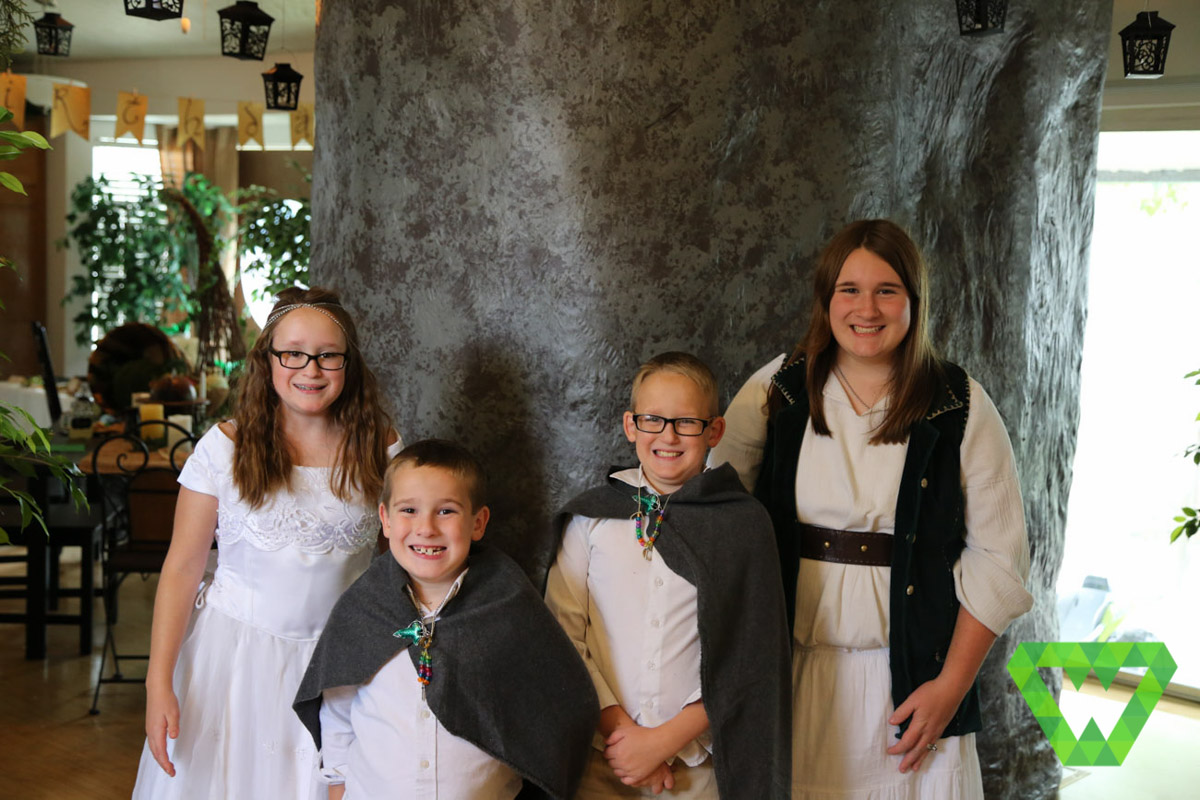
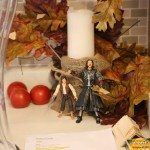
COSTUMES
Costumes were difficult without the help from some friends that regularly participate in a renaissance group. We borrowed some simple Medieval costumes for Brian, Katie, and I. The boys wore worn-out Sunday shirts with the sleeves rolled up. Pants came from thrift stores. We made the boy’s cloaks from a fleece fabric that we found on sale at a local fabric store. All 3 cloaks (including Brian’s) were made for about $30. Katie and Rebecca had elvish ears found at a Salt Lake City Comic Con. These can easily be found on Amazon. They stayed on pretty well using spirit gum. Rebecca’s dress was purchased at a thrift store for about $8 and was altered accordingly to fit her body type. We also found several great accessories online including a hairpiece ($1) and necklace ($5) for Rebecca, elvish leaf pins ($3) for the boys to pin their cloaks, the rings and chains ($1) the boys wore, and so much more. They came from China (which took about 6 weeks for delivery) but they were extremely cheap and added greatly to the theme of the parties. Make sure you explore Ebay’s costume jewelry department. Search for items between $1 and $3 and sort by “free shipping”. As long as you have time before your party you can get amazing accessories at affordable prices.
-

- Watching the blacksmith from Wasatch Forge
-
- Justin and Parker at the Hobbit Door
-
- Katie just won the donut eating contest.
-
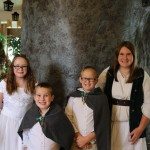
- The whole fellowship
-
- Rebecca (Lady Galadriel) enjoying her donut
PARTY GIFTS
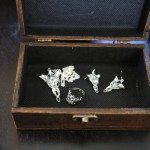
We enjoy giving our guests party gifts. In the past, we’ve had little cellophane baggies full of pencils or stickers or something. This year we didn’t want to break tradition or our theme. No cellophane bags for 2015. Instead Brian ordered rings from Amazon which were used on the cupcakes. Everyone also left with a miniature plastic compass, and a miniature sword necklace.
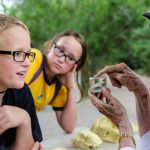
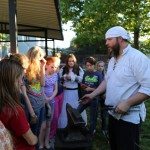
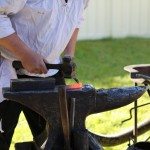
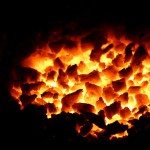
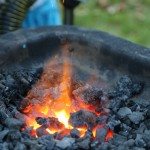
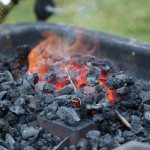
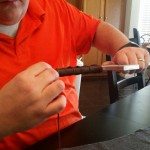
BLACKSMITH
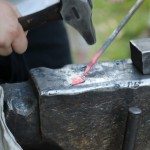
Blacksmith, wait? What? Before we even started making the tree or finding decorations Brian wanted to do something over the top for the party. Through a local convention Brian met blacksmith Matt Danielson of Wasatch Forge. Matt was willing to do a blacksmithing demonstration for our group. We could only afford to bring Matt out to one party and Katie’s group, the oldest, was easiest to schedule. Matt’s demonstration fee included time for instruction and a custom hand-made metal trinket for every guest that attended the party. WORTH EVERY PENNY. What an amazing experience. Note: Even though we notified each of our neighbors that we would be using a forge and anvil in the back yard…. make SURE they understand what you mean by that. 😉
-
- Blacksmith giving a lesson
-
- Watching the blacksmith from Wasatch Forge
-

- Watching the blacksmith from Wasatch Forge
-
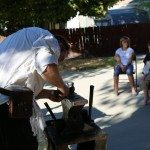
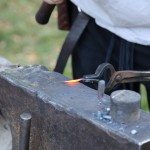
- The Wasatch Forge Blacksmith forgot to bring a tool to the demonstration… so he made a new one.
-
- Melting Ring
-
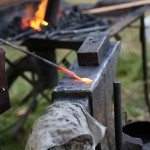
- Blacksmithing a leaf
-
- Blacksmithing a leaf
-

- Watching the blacksmith from Wasatch Forge
-

- Making a leaf
-

- Blacksmithing a leaf
-
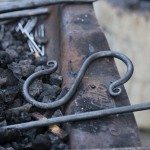
- A hook to hang plants
-

- Blacksmithing a leaf
-

- Blacksmithing a leaf
-

- Blacksmithing a leaf
INVITATIONS
Invitations are important because they convey the message, “we’re having a LOTR party and we mean it!” We made over 100 invitations for the kids to hand out for Birthdays and another 30+ for the Halloween party (most Halloween invitations were digital). We started with Photoshop. We made all five invitations at once and saved them as .JPGs. We find it easier to use the .JPG format when printing at home or Walgreens, etc. We used Window’s photo printing tool to print two 5″ x 7″ .JPG images onto one 8.5″ x 11″ piece of parchment paper (from local office store). It helped using a laser printer to make the black lines and text easier to see on top of the weird parchment paper. The inkjet printer’s ink just looked gray and washed out to us.
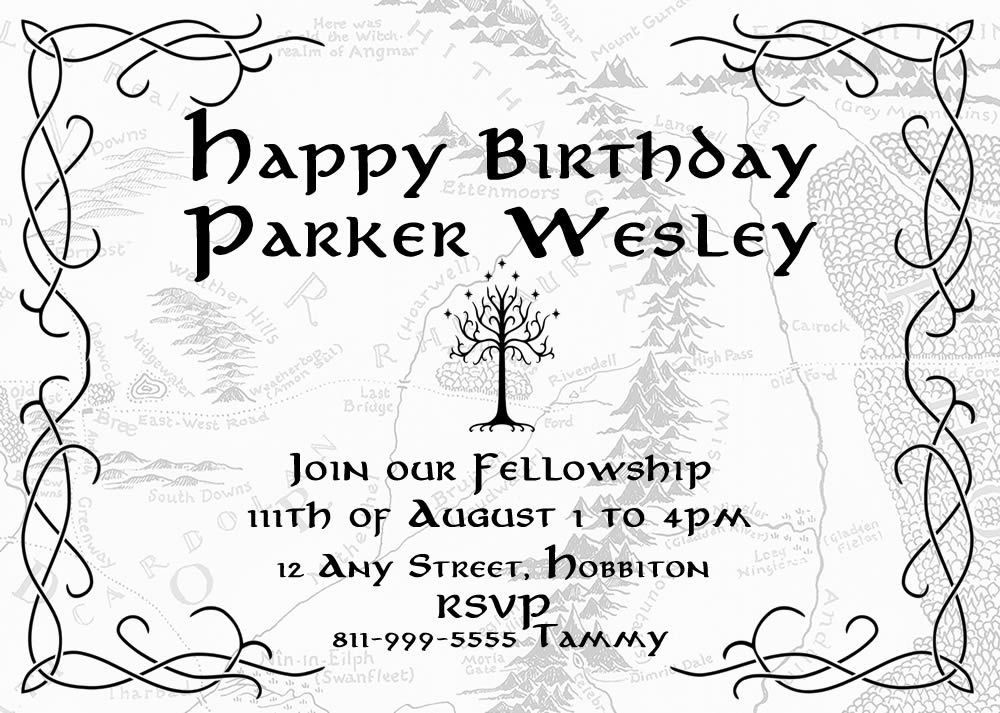
Lord of the Rings – Hobbit Birthday Invitation
We then hand-crumpled each invitation to make it distressed. We folded them twice to give us a ye olden letter-like seam. We then melted wax and used a seal to place a fancy “W” seal on each invitation. The wax was actually glue sticks made for wax seals. Using the gluesticks gave the EXACT look of wax but without all of the mess. Plus, it made things safer so the kids could help seal their own invitations. Each gluestick (used in a regular glue gun) was enough for 7-10 invitations. It really made things classy.
RESOURCES
Fonts. We gathered fonts from Font Hus, Fanjofey, Norfok and other websites. They were all free for us to download. Out of respect for each of those sources I’d recommend that you explore and find the fonts that you like. However, if you are using some of our graphics and you are having problems matching a font, feel free to download my LOTR font folder.
Here are the .PNG files we used to make the food labels.
THANK YOU
We hope that you have as much fun planning, preparing, and executing a Hobbit / Lord of the Rings birthday party as much as we did and would love to hear your ideas and stories as well! We can’t wait to make Star Wars a reality in our home next year!!!!!!!!
All of the Photos – LARGE GALLERY
-

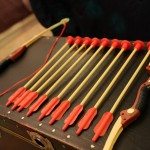
- Weapons borrowed from friends! Thanks TLCTrio.com Check out their Chess video.
-
- Paper mache tree and paper lanterns.
-
- The breads look so nice before being cut. Homemade pound cake. The breads could be made ahead of time and kept in airtight containers.
-
- Paper mache tree and structure
-
- Silhouette Cameo cut lanterns
-
- Making a leaf
-
- Lord of the Rings Birthday
-
- Witchking Fingers (Bugles corn chips)
-
- Gollum’s Worms (gummy worms). These were a favorite.
-
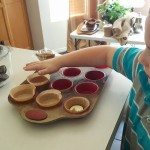
- Parker helping put in the cupcake liners
-
- Gollum is watching the books.
-
- Parker playing the ring-toss game.
-
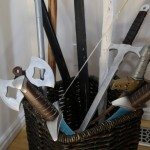
- Stow yer weapons!
-
- LOTR Ring Toss….. toss the One Ring into Mt Doom! This game was much harder than expected b/c of the oval rings. We made each kid play until they got 5 points. It was surprisingly difficult b/c of the oval shapes.
-

- Candles
-
- Lord of the Rings Birthday
-
- Lord of the Rings Birthday
-

- Justin and the Hobbit door
-

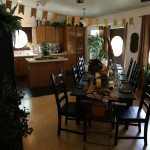
- Decor. The leather rolls in the bottom right-hand part of the stand were purchased on ebay for $1 each. They were pencil holders. The Thorin Key was purchased at a local bookstore. The brown grass is placed in a glass vase wrapped in burlap. The tin candle holder was found at Ikea for $3
-
- Decor
-

- Spare pieces of leather rolled up with crumpled parchment paper. To make these extra long I used two 8.5×11 paper sheets so they’d extend beyond the leather. Simple leather string kept them tied.
-

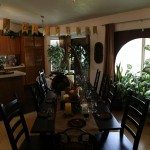
- Thorin & Company’s dining table
-
- Paper mache tree & structure
-
- EL Fudge cookies as the Council of Elrond
-
- Decor
-

- Watching The Hobbit Cartoon from 1977.
-
- Paper mache tree & structure
-
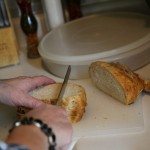
- Cutting up the homemade bread loaf (Lembas Bread).
-
- The horrible back of the round door. I wish I had used two hinges. I eventually covered this with some masonite to hide the ugly
-
- Found for $3 at a yard sale. It held all of our game pieces (i.e. BINGO) and game prizes.
-
- The horrible back of the round door. I wish I had used two hinges. I eventually covered this with some masonite to hide the ugly. Cargo straps helped keep things taught and made the door workable. A second hinge would have helped too.
-
- LOTR Decorations
-
- The living room, tree and map.
-

- decor
-
- Wrapping leather around the handle of a wooden sword. Leather remnants from local hobby store.
-
- Scrolls
-
- The living room.
-
- Treebeard’s Leaves. Found these at our local grocer.
-
- Lord of the Rings Birthday
-
- Melting Ring
-
- making the Happy Birthday sign…cutting with the Silhouette Cameo.
-
- A hook to hang plants
-

- Decor
-
- The One Ring (Funyun Rings). Yes, we already had The One Ring donuts. But hey, who’s counting?!?
-
- Becca’s jewelry purchased for cheap off of ebay’s costume jewelry department. All of this together was less than $20 although I had to wait 4 weeks to receive it from China.
-
- Parker making his Sting necklace. Hemp string.
-
- The breads look so nice before being cut. The breads could be made ahead of time and kept in airtight containers.
-
- making the Happy Birthday sign…cutting with the Silhouette Cameo.
-
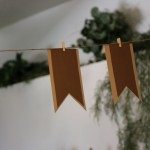
- I wanted to make the back of the Happy Birthday signs pretty since they’d be up for 9 weeks straight.
-
- The living room, the paper mache tree and map.
-
- Tree limbs and lanterns
-
- “The One Ring” donut on a string eating contest.
-
- The Food table.
-
- Silhouette Cameo cut lanterns
-
- Lord of the Rings Birthday
-
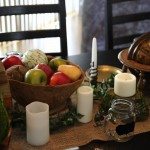
- This bowl was found at a gardening store for $1. They are normally used as hanging plant liners. Fake fruit.
-
- The food table (minus the chicken)
-
- The breads look so nice before being cut. The breads could be made ahead of time and kept in airtight containers.
-
- Getting set up
-
- The breads look so nice before being cut. The breads could be made ahead of time and kept in airtight containers.
-
- making the fence. Take a palate, break out every other board then cut in half.
-
- Paper mache tree
-
- Decorations. Notice the Rubbermaid container full of rings. Thank you Amazon.
-
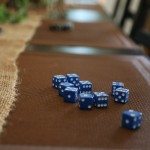
- Dice for playing Tensi. The placemats are needed to protect our wooden table. The dice corners slowly put tiny dents without the protection.
-
- Decoration
-
- Blacksmithing a leaf
-
- EL Fudge cookies as the Council of Elrond
-

- Decorations
-
- The Breads
-
- The table
-
- Blacksmithing a leaf
-
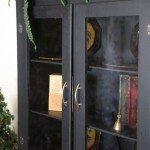
- DVD and audio CDs. Extra plates were placed in the pie safe.
-
- We used both cheese popcorn and Cheetos for “Mount Doom Lava” depending on which kid’s birthday it was.
-
- Cupcake table. There are two candles because one of the birthday boy’s friends also had a birthday that same day. We sang to both.
-
- Justin and Parker at the Hobbit Door
-
- Shelob’s lair with the light on. A black light really help give this character. Black contractor bags helped mask the rest of the bathroom (being remodeled).
-
- drawing the map
-
- Beorn’s Fish (goldfish) could have been called Gollum’s fish but we already had Gollum’s worms. Wheat thins were given the random name of Minas Tirith Bricks… I dunno if that’s the best name of them.
-
- Roasted Chicken from Sam’s or Costco.
-
- Homemade pound cake cut up
-
- Tree structure and Paper Mache
-
- Weapons
-
- Birthday SIgn held up by hemp rope.
-
- Farmer Maggot’s Ale (lemonade) and water.
-
- Empty food cans with LOTR baddies photos taped to the can. The images were donated by a friend and came from an old LOTR daily desk calendar.
-
- The Hobbit door with Gandalf’s scratch. I had wanted to draw vertical black lines to make it look less like a viking shield.
-
- The horrible back of the round door. I wish I had used two hinges. I eventually covered this with some masonite to hide the ugly. A spare car battery was a perfect counterweight.
-

- Treebeard.
-
- Dragon Eyes – Grapes. We tried several varieties and colors.
-
- Blacksmithing a leaf
-
- Silhouette Cameo cut lanterns
-
- Shelob’s lair was built in a bathroom we’re remodeling. We used spare pieces of wood and black contractor trash bags to create the “tunnel”. We used thick yarn to make the string. Skinny string can hurt if it’s caught in the right place. The yarn was easy to repair if it got broken.
-

- Blacksmithing a leaf
-
- Parker and the Hobbit door.
-

- The paper mache tree.
-

- Thorin’s Key. Purchased from a local bookstore.
-
- Decorations. The plants helped hide the hideous round-window edges. I was going to paint the masonite used for the round windows but it helped give more color and a sort of English Tudor-like look to the room.
-
- The Front of our Bag Eng.
-
- Blacksmithing a leaf
-
- I didn’t want any nail or screws in my drywall so I used a 40lb counterweight and brackets to make sure the branches didn’t budge.
-

- Parker enjoying his party
-
- A space piece of masonite painted with spare paint. The words are vinyl cut out by the Silhouette Cameo.
-
- Hobbit Doors can be made up a day ahead of time. Fudge striped cookies with M&Ms (turn the M&M logo downward).
-
- The map is a piece of seamless photography backdrop paper.
-
- handdrawn map
-
- Silhouette Cameo cut lanterns
-
- Decorations and chalk for the glass mugs.
-
- Blacksmithing a leaf
-
- bow and arrow game. It seems close but those bows are pretty weak.
-
- Guests making the Sting necklace.
-
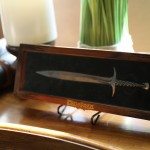
- Decorations. Sting letter opener.
-
- Lots of candles.
-
- Ring Toss game. This board was repurposed from last year’s “LEGO pinewood derby race” game.
-
- Ring toss game. These are actually wooden O letters from a local hobby store (bought w/ half off coupons) and spray painted silver and gold (2 teams). The letters were vinyl stickers cut out by the Silhouette cameo. They stickers held tight for all 4-5 parties and well over 100 kids.
-
- The food table ready for Thorin and Company. You can also see the back of the Happy Birthday sign.
-
- Wrapping leather around the handle of a wooden sword. Leather remnants from local hobby store.
-
- Lord of the Rings Birthday
-
- We got these bows and arrows for $5 a set at Walmart. I needed two but bought a third just incase. They are a pretty horrible shot and this part of the relay race was quite the bottleneck. However, it was one of the kid’s favorites. I was surprised how many kids didn’t know how to knock an arrow and play. An older kid was assigned to man this game and reclaim shot arrows. After about 100 kids played we only had one broken arrow.
-
- BINGO…. we should have called it BILBO. Flattened glass marbles (often used in vases for decoration) were used as markers.
-
- Beorn’s Fish (goldfish) could have been called Gollum’s fish but we already had Gollum’s worms. Wheat thins were given the random name of Minas Tirith Bricks… I dunno if that’s the best name of them.